hours left for
same day shipping


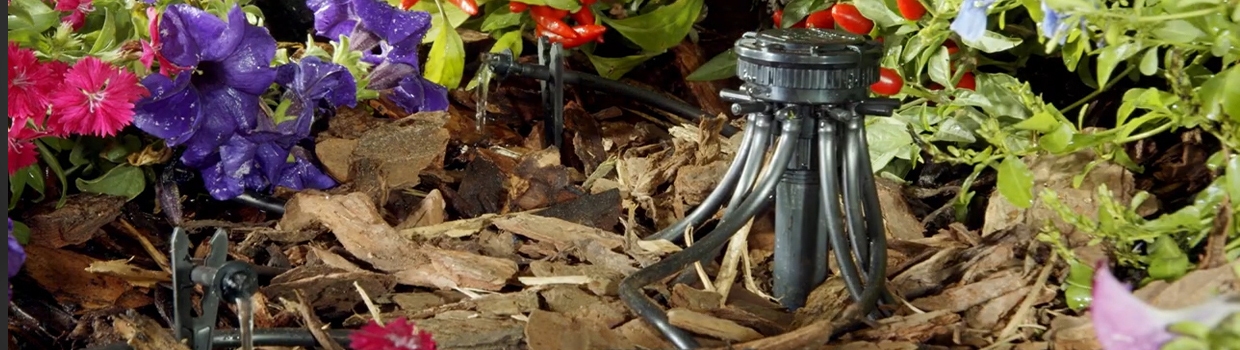
Drip emitter manifolds allow you to convert an existing sprinkler into a drip irrigation system. They act as a hub, splitting the water supply into several different drip lines, each leading to an emitter. Drip manifolds can come with 4, 6, 8, or 12 outlets, accommodating irrigation systems of all sizes. Some drip emitter manifolds also come with built-in pressure regulation, ensuring consistent water flow to each outlet. Order drip irrigation manifolds from Sprinkler Warehouse today.
Which Drip Emitter Manifold should I choose? How do you use a manifold to convert a shrub stick into a drip system? What’s the difference between an adjustable drip manifold and a non-adjustable one?
Watch these videos to learn more about Drip Manifolds.
Installing a drip irrigation manifold begins by planning out your watering zones. This will help you set up the manifold in a way that can accommodate an emitter in each section that needs one. Next, begin connecting the manifold to your watering system, usually a hose or riser, and attach tubing to the outlets. Also remember to use plugs or caps to close off any outlets on the manifold that you’re not using. This helps maintain system pressure. Once the tubing is securely attached, run them from each outlet to the desired plant or zone and attach any emitter of your choice to their ends.
A typical drip irrigation manifold usually has 2 to 12 outlets. However, there are models with more outlets, often used for larger systems or specialized irrigation setups. The number of outlets determines how many drip lines or emitters can be connected, so consider how big your irrigation system will be before choosing a drip manifold.
Yes, connecting different types of emitters to a drip irrigation system manifold is a great way to meet the diverse watering needs of various plants or zones. Just make sure that the total flow rate of all connected emitters does not exceed the capacity of the manifold or the water supply.
It is common practice to cap unused outlets on a drip emitter manifold to prevent leaks and maintain system pressure for the lines that are in use. Most manifolds come with compatible plugs or caps for sealing unused outlets.